Pit Information
Below you will find basic information regarding the anatomy of a loose foam (bungee) pit. Please bear in mind that there are no established standards or requirements set by any organization for fear of liability issues. This is provided only to show the fundemental concepts of our common pit assembly. You may find or be familiar with several types of pits. There are several varieties. These are the type of pits that seem to be the most popular in the United States. If you have a preference as to how you would like one provided, just let us know. As you likely know, no pit -- or any other piece of gym equipment, can be considered 100% safe. We urge you think safety first. (See warning below.)
It is important to note that NO pit of any kind can completely eliminate the possibility of serious neck or back injury. Every effort must be taken to avoid landing on the head or neck, especially going forward. Careful gymnastic progression must be followed to avoid dangerous landings on the neck.
Training pits should be longer and wider than competition matting requirements. Since gymnasts have not yet mastered the skills they will be performing, like they would in competitions, they need a larger margin of safety in the size of the safe landing areas. Gymnasts landing in pits may fall backwards or sideways striking the edge of the pit if it is not wide or long enough.
There are two main styles of Pits - A Loose Foam Pit and a Layered Inground System (sometimes referred to as a Modular In-Ground Pit).
Loose Foam Pits
Concrete
Building your pit begins with excavation and forming up of the pit walls.
Footing should be placed on at least 4" of gravel. Water-proofing of foundation wall is required. Have your contractor use 3500 psi (or better) concrete with aggregate
(rock). The walls should have a smooth (slick) finish and be 8" thick on all sides. Many recommend that #4 rebar be used on concrete around the pit. They should be
absolutely straight for mounting hardware - it is best to use forms. Do not use block.
It is also recommended that the concrete cure for 30 days before mounting the hardware.
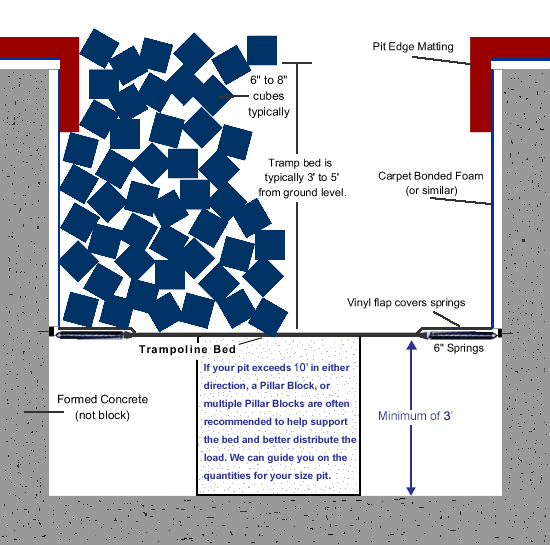
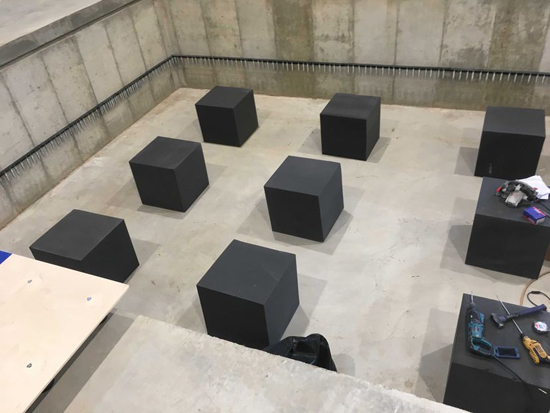
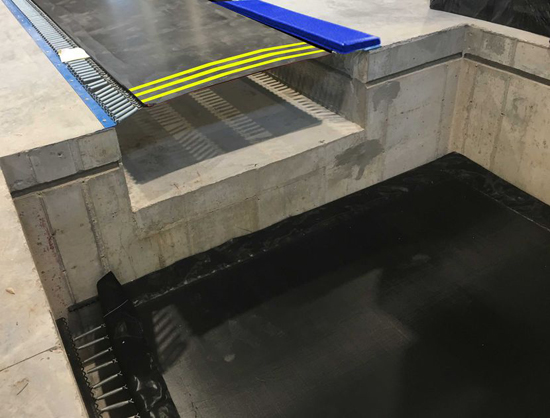
Tramp Section - You then attach the angle iron hardware to the concrete with provided wedge bolts through it's pre-drilled holes. Attach 3' to 5' below ground level - three to four feet are fairly standard. It should be noted that it is generally recommended to have 3 feet of space below the bed of the trampoline bed - depending on the pit size, a Pillar Cube or several are normally recommended depending on the length and width. Pillar Cubes are normally made of 16 ILD foam. The Angle Iron has a zigzag wire welded to it. Attach the tramp bed to the zigzag wire with 6" high quality springs. Spring attachments are spaced approximately 4 to 4 1/4"
apart. Springs should be attached with the hooks facing down. The bed will have a flap to go over top of the springs. The Flap has holes about every two feet so it can be secured. The tramp bed is made of the same polypropylene material as trampoline beds. (Specific instructions will be supplied with your order.)
Use some sort of foam to protect users from contact with the bare concrete. Many use a sections of Carpet Bonded Foam. It seems to hold up best. You will likely need to apply this with contact cement. Make sure you have adequate ventilation during the installation process. Many use respirators for this step. If your pit spans an area greater than 10 feet, it is highly recommended to add Pillar Cubes under the bed to help support the bed from the static weight of the cubes and lengthen the life expectancy of your springs.
Pit Edge Matting
This product
velcros to the Carpet Bonded Foam and provides maximum protection around the perimeter. You may not need it all around the pit depending on use. Fill with foam blocks and you are< ready for action!
About Pit Cubes
These are generally available in 6" or 8" cubes. The overall cost comes to about the same to fill any given area. So, it comes down to which size you like. Pit cubes are very expensive to ship. They are bulky and light, so they are not popular with freight companies. Some suppliers will supply them vacuum packed to save on the freight costs. They should be opened immediately on receipt -- left vacuumed packed for too long and they may be permanently and irreparably damaged.
All pit cubes are made of polyurethane foam. This type of foam does fade or yellows when exposed to fluorescent light sources. This in no way diminishes nor compromises the useful life and/or energy absorbent properties of these cubes. It is merely a cosmetic issue inherent to this type of material and will occur regardless of the manufacturer.
Foam cube pits do require maintenance. Foam cubes will compress and compact over time and need to be "fluffed" regularly. Fluffing means that all cubes should be removed from the pit, and the pit should be cleaned and debris removed before putting the cubes back in. Raw foam will break down over time and the pit will have to be replenished. Most customers will replace a small amount of cubes annually or bi-annually. See more on Pit Cubes here.
Layered Inground Pits
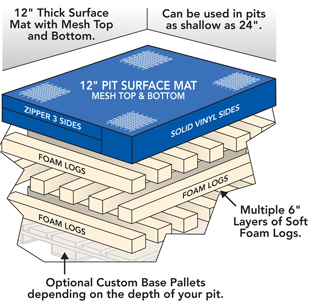
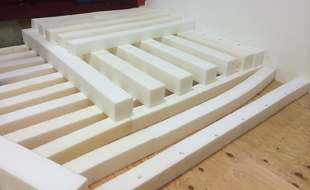
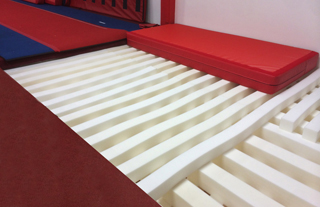
Instead of filling your pit with a full sized encased pit or cubes, the Layered Inground Pit System is much more cost effective and provides a better landing impact absorption. This system features base layers of soft foam logs (generally 6" to 12" thick) that channel and regulate airflow from the impact site to promote optimal energy dispersion. These logs will need to be glued together at their contact points.
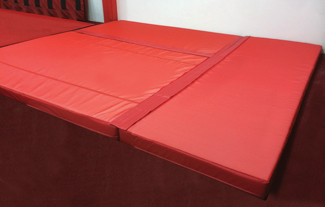
If you would like us to price the hardware, pit edging, cubes or Carpet Bonded Foam. Sketch and dimension your pit (it can be any shape) and email us - here. Be sure to:
- Describe exactly what type pit you are requesting with dimensions.
- Give your city and zip code.
- Give your name and phone number.
- Give your email address.
We will email you a delivered price.
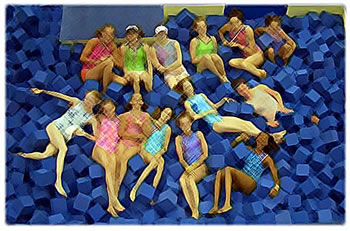
Warning: Again, no pit of any kind can completely eliminate the possibility of serious neck injury or back injury. Every effort must be taken to avoid landing on the head or neck, especially going forward. Head-first entries should be avoided at all cost. The current state-of-the-art in loose foam training pits does not preclude the possibility of serious, catastrophic injury or even death. Careful gymnastic progression must be followed to avoid dangerous landings on the neck. Use the pit under direct supervision of competent gymnastics professional. Safety signage is additionally recommended to serve as a constant reminder of safety issues in the pit area. We strongly suggest periodic inspections - at least every 90 days. of the springs, frame attachment, and bungee bed to be sure all parts are working effectively and no tightening or replacements are needed.
Disclaimer: This construction guide is for informational purposes only. When building a pit, consulting an insurance company for liability protection is advised. The American Gym will not be held liable for improper design or construction of a foam pit that results in injury or death. The above information consists of general (and unpublished) industry standards as it appears in the field in gyms in the US and should be considered as general guidelines only. Contact a gym professional to review the specifics of your gym's pit. A routine schedule should be maintained to be certain that the springs are not stretched out, the bed is not showing signs of excessive wear, or that the angle iron is detaching from the walls, rusting, etc. Certainly, in all pit areas, we recommend an abundance of caution. It is likely the most dangerous area of a gym and should command constant attention.
Any activity involving motion, rotation or height creates the possibility of serious injury, including permanent paralysis or even death from landing or falling on the neck, head or other parts of the body. Use of a foam pit should always have a trained and qualified instructor present. Absolutely do not allow any head first pit entries. Athletes should be trained to attempt landing on the back, as opposed to belly landings or feet first landings. Adequate training to learn back landings should be taught until it is an automatic process for athletes before training more difficult skills.
Our Products
Your Cart
Your Account
 Login Status

